

Claude Code has become one of the most talked-about tools in the software development space, while Codex and Gemini are also part of the day-to-day toolkit for many developers. The problem is that once you start using more than one of them, the setup overhead starts to show up quickly.
Different authentication flows, different base URLs, different model assumptions, and different configuration patterns can make the experience feel more disconnected than it should. Bifrost's own CLI-agents docs position the product around solving exactly this kind of fragmentation, with universal model access across supported agents plus MCP integration and observability through the gateway.
That is what made Bifrost CLI interesting to me.
Instead of treating Claude Code, Gemini, and Codex as three separate terminal workflows, Bifrost CLI lets me launch them from one interface while routing everything through the Bifrost gateway. According to the official docs, Bifrost CLI is built around an interactive setup flow where you choose your gateway, harness, and model, and then launch the session without manually stitching together the configuration yourself.
The broader Bifrost agent docs also make it clear that this is not only about opening multiple tools from one place — it is also about being able to use different provider/model combinations with supported agents through the same gateway-backed workflow.
In this post, I will walk through how I use Claude Code, Gemini, and Codex from one interface with Bifrost CLI, and why the more interesting part is not just multi-agent access, but the ability to think more flexibly about both agent choice and model choice in the same workflow.

Table of Contents:
- Why I Wanted One Interface for Claude Code, Gemini, and Codex?
- What Bifrost Is, and Why the Gateway Matters
- What Bifrost CLI Does Differently?
- Using Claude Code Through Bifrost CLI
- Using Codex Through Bifrost CLI
- Using Gemini Through Bifrost CLI
- One Interface for Agents and Models
Enjoying this article? Subscribe to To Data & Beyond — a newsletter designed to help you grow in Data Science and AI, beyond the basics.
For a limited time, get 50% off your paid subscription, plus 50% off my 8 books and 5 courses
1. Why I Wanted One Interface for Claude Code, Gemini, and Codex?
Over the last few months, AI coding agents have become a solid part of my development workflow and also a part of many developers ' workflows. Claude Code has been getting a lot of attention and is currently leading the race. Codex remains a familiar option for developers who like OpenAI's ecosystem, and the Gemini CLI is also becoming part of the conversation for people who want another strong coding assistant in the terminal.
The problem is that using multiple coding agents usually means dealing with multiple setup styles.
Each tool tends to come with its own assumptions around authentication, base URLs, model selection, and configuration. Even when each setup is not too complicated, the friction starts to add up once you want to move between tools or test different model-and-agent combinations for real work.
That is the part I found interesting about Bifrost CLI.
What caught my attention was not just the idea of launching different coding agents from one command. The more interesting part was that Bifrost sits in front of those agents through its gateway, which means the workflow is not only about switching between Claude Code, Gemini, and Codex. It is also about choosing and routing models more flexibly from one interface. Bifrost's official docs describe this as universal model access, where any provider or model configured in Bifrost can be used with supported agents.
So for me, the appeal of Bifrost CLI is simple: instead of treating Claude Code, Gemini, and Codex as completely separate terminal setups, I can treat them as part of one workflow.
That changes the story from:
"Which coding CLI should I use?"
to something more practical:
"How can I work across different coding agents and models without reconfiguring everything every time?"
That is the idea I wanted to explore in this blog, and I wanted to show you step by step how to do it.
2. What Bifrost Is, and Why the Gateway Matters
Before talking about Bifrost CLI itself, it helps to understand what Bifrost actually is.
Bifrost is an AI gateway. In simple terms, it sits between your applications or tools and the underlying model providers. Instead of wiring every tool directly to each provider separately, Bifrost provides a unified layer in front of them. The official docs describe it as an OpenAI-compatible AI gateway for many providers, with support for features like observability, governance, caching, failover, and load balancing.
That matters because Bifrost CLI does not work as a standalone magic wrapper with its own model system. It works by connecting coding agents to the Bifrost gateway you already have running.
Getting Started with Bifrost CLI
In the CLI quick start, the flow starts by launching the Bifrost gateway first, usually with:
npx -y @maximhq/bifrostThis starts the gateway locally, typically on http://localhost:8080. Then, in another terminal, you launch the CLI:
npx -y @maximhq/bifrost-cliOnce it is installed, you can open a new terminal and just run:
bifrostOnce you run it. You need to have Claude code, Gemin CLI, and codex CLI installed and running already to be able to work with them.
If you have not installed them, you can install them easily by following these steps:
- You can install Claude Code with the following command:
curl -fsSL https://claude.ai/install.sh | bashOnce it is installed, you can start with this command:
claude
2. You can install Codex CLI with the following command:
npm install -g @openai/codexOnce it is installed, you can start with this command:
codex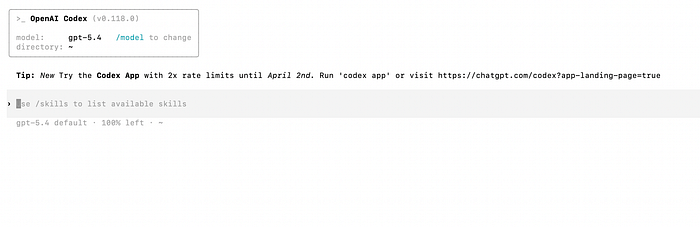
3. You can install Gemini CLI with the following command:
npm install -g @google/gemini-cliOnce it is installed, you can start with this command:
gemini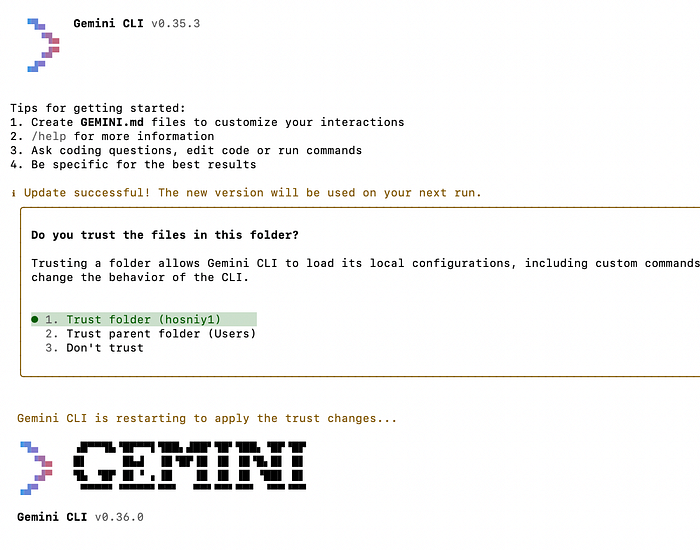
It is noteworthy to mention that you will need to have a Pro subscription for each LLM provider to be able to use them, or you can provide an API key for each model. Now let's go back to Bifrost CLI and start it in a new terminal.
bifrostOnce it starts, you can choose the coding agent you want to use it. I will start with Claude Code:

The real benefit here is not just that Claude Code, Gemini, and Codex can be opened from one interface. The real benefit is that they can all plug into the same control layer. That opens the door to a more flexible workflow around model access, observability, and agent configuration.
You can think about it like this:
- Bifrost gateway = the routing and control layer
- Bifrost CLI = the interactive workflow layer for launching coding agents through that gateway
That distinction makes the rest of the article easier to understand.
3. What Bifrost CLI Does Differently?
Normally, when I want to try a coding agent, there is usually some setup friction involved. That may mean environment variables, provider-specific base URLs, API keys, model configuration, or separate installation steps depending on the agent.
Bifrost CLI replaces a lot of that with an interactive flow where I launch one command, choose my setup, and let the CLI handle the rest. The docs describe it as an interactive terminal tool that connects coding agents to a Bifrost gateway with zero manual configuration.
In practice, that means I start by launching the CLI:
bifrostFrom there, Bifrost CLI walks through a setup flow that includes the gateway URL, an optional virtual key, the coding harness I want to use, and the model I want to launch with. According to the official getting-started docs, the CLI automatically configures base URLs, API keys, and model settings for each supported agent, fetches available models from the gateway's /v1/models endpoint, and can install missing agents via npm if needed.
Another part I like is that the experience does not stop after the first launch. Instead of exiting after one session, Bifrost CLI keeps everything inside a persistent tabbed terminal UI. The getting-started material describes one tab per running or recent session, along with activity badges that show whether a session is actively updating, idle, or has raised an alert. That makes the tool feel more like a real workflow layer than a one-shot launcher.
There is also a practical security detail here that I think is worth mentioning. The CLI stores virtual keys in the OS keyring rather than plaintext config files, while regular defaults such as base URL, harness, and model can be written to the CLI config. That split makes sense: keep the reusable workflow state handy, but do not leave secrets sitting in plain text.
So the simplest way I would describe Bifrost CLI is this:
- It gives me one entry point for Claude Code, Gemini, and Codex
- It lets me choose models through the same flow
- It removes a lot of the repeated setup friction
- It keeps the workflow persistent enough that switching sessions feels natural
That combination is what makes it more useful than a wrapper that only launches tools and then gets out of the way.
4. Using Claude Code Through Bifrost CLI
Claude Code is the best place to start with Bifrost CLI, especially because it is the coding agent many developers are paying attention to right now.
What I like here is that I do not need to think about Claude Code as a separate setup with its own manual configuration flow. Instead, I launch Bifrost CLI, choose Claude Code as the harness, select the model I want, and update the rest of the session settings directly from the interactive terminal screen.
In this case, that means starting with:
npx -y @maximhq/bifrostThen, in another terminal:
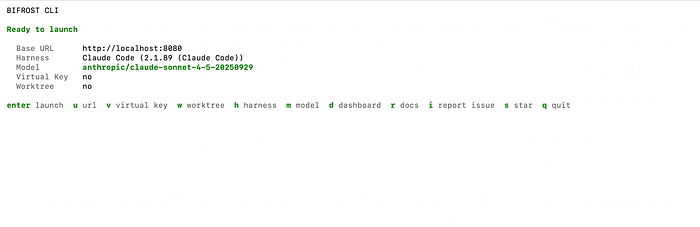
bifrostOnce Bifrost CLI opens, I can configure the session from the terminal interface itself. As shown in the launch screen, I can review and change the Base URL, Harness, Model, Virtual Key (get it from Bifrost), and Worktree without editing config files or manually exporting environment variables.
That is an important part of the experience. Instead of wiring Claude Code by hand, Bifrost CLI turns the setup into a guided launch flow. From this screen, I can press:
- u: to change the base URL
- v: to add or update the virtual key
- h: to switch the harness
- m: to select a different model
- w: to enable a worktree for Claude Code
- Enter: to launch
This is one reason Claude Code works well as the anchor for the article. It already has strong developer interest, but Bifrost CLI makes the workflow around it much smoother. I am still using Claude Code as the coding interface, but I am doing it through a layer that gives me more flexibility around routing and model selection.
That flexibility is the bigger story. Bifrost's documentation describes this as universal model access, which means the agent interface and the underlying model do not always have to be locked together. So instead of thinking about Claude Code as one fixed setup, I can think of it as the interface I want to work in, while Bifrost handles the model side underneath. That is what makes the workflow more interesting than a standard single-agent launch.
Another detail I like is that Claude Code gets a deeper workflow fit inside Bifrost CLI than just basic launching. The CLI supports worktree mode for Claude Code, which is useful when I want to isolate a feature branch or parallel coding task. The docs you shared earlier also note that Bifrost can automatically attach its MCP server for Claude Code, which makes the integration story even stronger.
So in practice, my Claude Code workflow through Bifrost CLI looks like this:
- Start the Bifrost gateway
- Run bifrost
- Confirm Claude Code as the harness
- Pick the model from the Bifrost CLI screen
- Adjust any settings I need from the same terminal UI
- Press Enter to launch
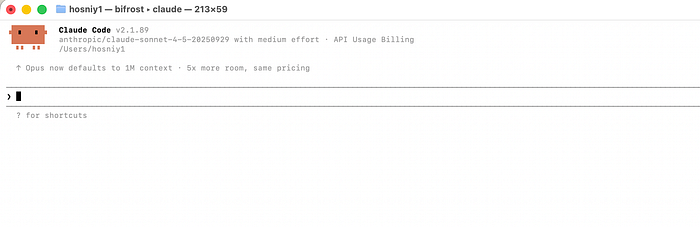
Now, once you press enter to launch, Claude Code will start through Bifrost as seen in the figure above, and you can start using it normally. Next, we will see how we can do the same with Codex.
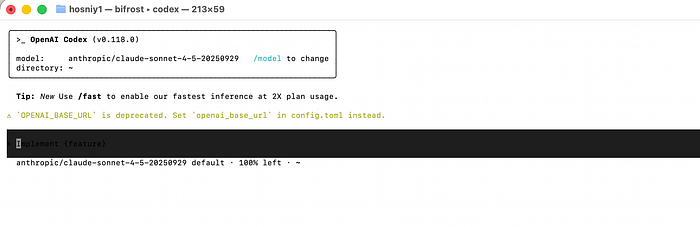
5. Using Codex Through Bifrost CLI
Once Claude Code is working through Bifrost CLI, the next interesting step is Codex. This is where the "one interface" story becomes more convincing, because I am no longer just reusing the same launch flow for another coding agent.
I am also reusing the same gateway-backed model workflow. Bifrost's Codex documentation describes Codex CLI as working with Bifrost through its OpenAI-compatible endpoint, while still allowing access to models from other providers through Bifrost's translation layer.
In a manual setup, Codex is configured by pointing it to Bifrost's OpenAI-compatible base URL and giving it a Bifrost virtual key through OPENAI_API_KEY. The docs show the base URL as http://localhost:8080/openai/v1 and the model configured in codex.toml.
But for this article, I prefer using the Bifrost CLI path for the same reason I preferred it with Claude Code: it keeps the workflow consistent.
Instead of editing Codex configuration files directly, I can launch the same Bifrost terminal UI, switch the harness to Codex, pick the model I want, and start the session from the same interactive screen. That is a much better fit for the promise of this post, because the article is really about using Claude Code, Gemini, and Codex from one interface rather than maintaining three separate setup patterns.
What makes Codex especially useful in this setup is that Bifrost does not limit it to OpenAI-hosted models. The Codex docs explicitly say Bifrost can translate requests to other providers, and they show Codex being launched with models like:
codex - model anthropic/claude-sonnet-4–5–20250929
codex - model gemini/gemini-2.5-pro
That is one of the clearest examples of why Bifrost is more interesting than a simple launcher. Codex remains the agent interface, but the model underneath can come from a different provider through the same gateway-backed workflow.
To summarize, to use Codex, you can follow these simple steps:
- Open the same Bifrost CLI interface
- Switch the harness to Codex
- choose a model such as anthropic/claude-sonnet-4–5–20250929
- launch from the same ready-to-launch screen

Then you can simply launch Codex through Bifrost CLI while using the anthropic Claude Sonnet model, which is amazing!
One small practical note worth keeping in: the Codex docs mention that Codex prefers OAuth over custom API keys, and recommend running
/logoutbefore configuring the Bifrost gateway with Codex. They also note that when using non-OpenAI models, those models need to support the tool-use capabilities Codex expects. That is a useful caveat to include so the article stays practical and honest.
6. Using Gemini Through Bifrost CLI
By the time I get to Gemini, the value of Bifrost CLI becomes much easier to appreciate.
I am no longer learning a third setup or managing a separate configuration path. I am still using the same Bifrost interface, the same launch flow, and the same model-selection workflow. The only thing I changed is the harness.
That is what makes this feel like one interface instead of three disconnected tools.
In practice, the flow is simple. I open Bifrost CLI, switch the harness to Gemini, choose the model I want, and launch from the same terminal screen I used earlier with Claude Code and Codex.
# Terminal 1
npx -y @maximhq/bifrost

# Terminal 2
bifrost
From there, I press h to switch the harness to Gemini, m to choose the model, and Enter to launch.

This is also where the bigger Bifrost story becomes more visible. According to the official Gemini CLI docs, once Gemini CLI is routed through Bifrost, all Gemini CLI traffic flows through the Bifrost gateway, which gives access to any provider/model configured in that Bifrost setup, along with observability and governance.
That means Gemini is not limited to Google-hosted models only. The Gemini CLI docs explicitly show Bifrost translating requests, so Gemini CLI can run with models from other providers using the provider/model-name format, including examples such as openai/gpt-5 and anthropic/claude-sonnet-4-5-20250929.
One honest caveat is worth mentioning here. The Gemini CLI docs note that non-Google models must support tool use for Gemini CLI to work properly, because Gemini CLI relies on tool calling for file operations, terminal commands, and code editing. So while the workflow is flexible, compatibility still matters.
That said, the overall experience is exactly what I wanted from this setup: I can keep the same Bifrost interface, switch to Gemini in a few keystrokes, choose the model I want, and keep moving without rebuilding the workflow from scratch.
7. One Interface for Agents and Models
After using Claude Code, Codex, and Gemini through Bifrost CLI, the biggest takeaway for me is that the real value is not just "multiple coding agents in one place."
The more important benefit is that Bifrost gives me one interface for working across both agents and models.
That sounds like a small distinction at first, but it changes the workflow quite a bit.
Normally, coding agents and models tend to feel tightly connected. Claude Code is usually associated with one family of models. Codex tends to be associated with another. Gemini has its own default expectations, too. Once you work through Bifrost, that relationship becomes more flexible because the coding agent I interact with and the model serving the request do not always have to be tied together in the usual way. Bifrost's docs explicitly frame this as universal model access across supported agents.
That is why I think "one interface" is the right way to describe Bifrost CLI.
It is not just one command for launching different tools. It is one consistent flow for:
- Choosing a coding agent
- Choosing a model
- Changing those choices without rebuilding the setup
- Moving across sessions from the same terminal workflow
In practice, that means I can use Claude Code because I like its interface, switch to Codex when I want to compare behavior, or move to Gemini without starting from scratch each time. At the same time, I can think about model choice as a separate decision. That is a much more practical workflow than treating every agent as a completely separate island.
This is also the part that makes Bifrost more interesting than a simple launcher.
A launcher can save a few keystrokes. But Bifrost is doing something more useful: it turns the gateway into the control layer underneath the agents. That is what makes it possible to keep the workflow consistent while being more flexible about provider and model selection. The official Bifrost overview describes the gateway as the unified layer in front of providers, with features like observability and governance, and the CLI-agent docs show how supported coding agents plug into that layer.
For me, that leads to three practical benefits.
- First, it becomes easier to compare agent behavior on the same kind of work. Instead of setting up each tool separately, I can move between Claude Code, Codex, and Gemini from the same interface and focus more on how they behave.
- Second, it becomes easier to experiment with model choice. If I want to try a different model with a coding agent, Bifrost makes that feel like a normal part of the workflow rather than a separate integration task. The Codex and Gemini docs both explicitly show cross-provider model examples through Bifrost, and the overview does the same for Claude Code.
- Third, it reduces setup friction over time. Even when the configuration is not hard, repeating it across tools gets old. Bifrost CLI replaces that with a single interactive flow, remembered settings, and a persistent terminal UI built for relaunching and switching sessions.
So if I had to summarize the bigger benefit in one sentence, it would be this:
Bifrost CLI does not just give me one place to launch Claude Code, Gemini, and Codex — it gives me one workflow for mixing agent choice and model choice more freely.
That is the part that makes the setup feel genuinely useful rather than just convenient.
After using Claude Code, Codex, and Gemini through Bifrost CLI, the biggest takeaway for me is that the value here goes beyond convenience.
What Bifrost CLI really changes is the workflow. Instead of managing separate setup paths for each coding agent, I can work from one interface and let the Bifrost gateway handle the routing layer underneath. That makes it easier to move across agents, experiment with different model combinations, and keep the overall experience more consistent. Bifrost's documentation describes this as universal model access, and after using it across these three agents, that framing makes a lot of sense.
If you are already interested in Claude Code but also want the flexibility to work with Gemini and Codex from the same terminal workflow, Bifrost CLI makes that setup much more practical.
If you found this helpful and want to go deeper, I'm running a live workshop:
Building Agent Skills for Claude Code
This is a 1.5-hour hands-on session where we'll go beyond theory and actually build Skills together — from idea → design → implementation → testing.
