Welcome to the Dry Lab
For centuries, chemistry meant glassware, reagents and instruments. The laboratory was where chemistry happened; full stop. But over the last two decades, a second laboratory has emerged. It has no fume hood, no analytical balance, and no shelves lined with chemical reagents. It runs on a laptop, costs nothing to enter, and is open to anyone with curiosity and an internet connection. This is the dry lab. And in this article, you will set up your first one.
Not a Medium member? No problem. Read free here.
What is a dry lab?
Unlike a traditional laboratory, where experiments are performed with chemicals and instruments, a dry lab relies on computational tools to investigate chemical problems. Whenever chemical work is carried out on a computer rather than at the laboratory bench, the work is said to be performed in a dry lab. A traditional chemistry laboratory where chemicals are weighed, mixed, heated, and analysed is known as the wet lab.
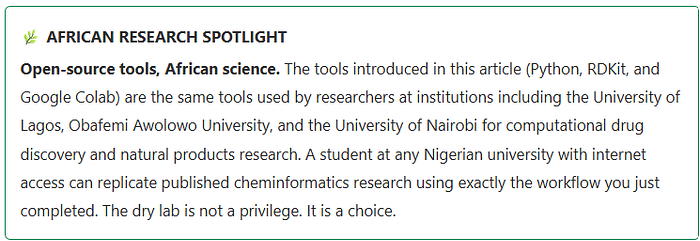
For a chemistry student or researcher in Nigeria, this matters enormously: the dry lab requires no reagents, no equipment budget, and no institutional funding. A laptop and an internet connection are sufficient to begin.
Your Dry Lab Toolkit
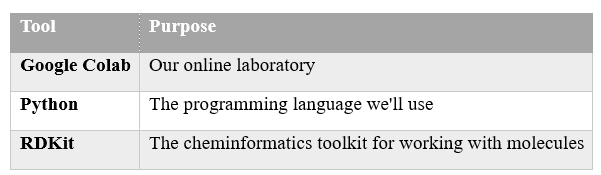
A dry lab requires no chemical reagents, but it is not completely empty. Just as a traditional laboratory needs glassware and analytical instruments, a dry lab requires a small collection of software tools. Fortunately, every tool we will use in this series is free, open source, and accessible through a web browser.
Google Colab
Google Colab is the laboratory bench of our dry lab. It is a free cloud-based environment where we can write and run Python code directly from a web browser without installing any software.
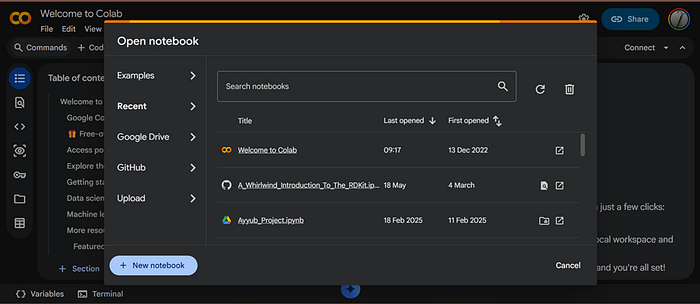
Because it runs entirely in the cloud, Google Colab works on Windows, macOS, and Linux. It works on any device with a browser, including low-specification laptops: no installation, no IT support, and no software license required. All you need is a Google account and an internet connection. Whether you are working alone or collaborating with a colleague, your notebook can be accessed and shared from anywhere.
Throughout this series, Google Colab will serve as our digital laboratory. It is where we will draw molecules from their SMILES representations, calculate molecular descriptors, build QSAR models, and apply machine learning to solve chemical problems.
Python
Python is the language that powers our dry lab. It is one of the most widely used programming languages in science because it is easy to learn, free to use, and supported by thousands of scientific libraries. In cheminformatics, Python allows us to automate repetitive tasks, analyze chemical data, and build machine learning models with just a few lines of code.
"You do not need to be a programmer to use Python in cheminformatics; you need to be a chemist who's willing to learn one new tool."
RDKit
While Python provides the language, RDKit provides the chemistry. RDKit is an open-source cheminformatics toolkit that enables Python to read molecular structures, generate molecular descriptors, calculate fingerprints, visualize compounds, and perform many other chemical computations. It is widely used in both academic research and the pharmaceutical industry, making it the ideal starting point for any chemist entering the computational world.
Let's Build Our Dry Lab
Step 1: Open Google Colab
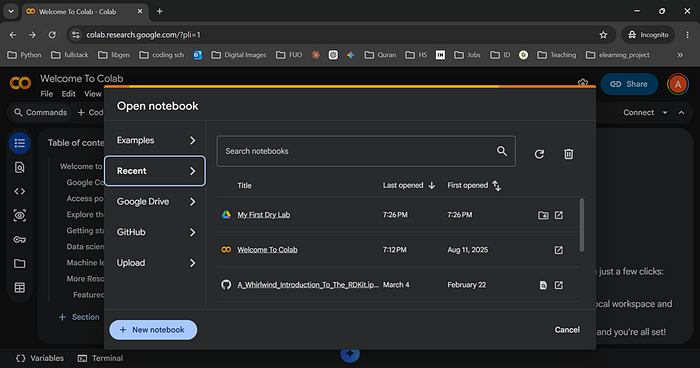
Open your web browser and navigate to Google Colab. Sign in with your Google account, then click New Notebook to create your first computational chemistry workspace.
- Go to Google Colab.
- Sign in with a Google account.
- Click New Notebook.
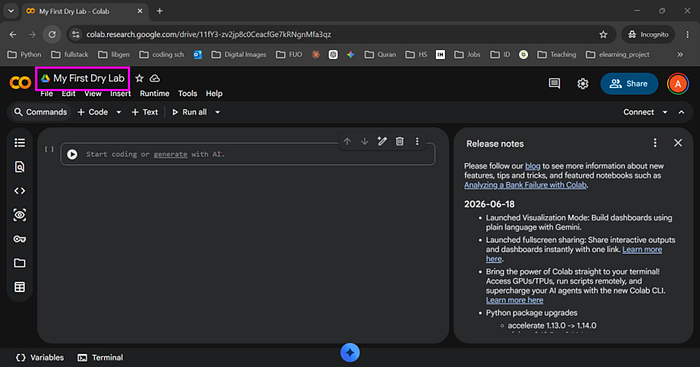
Step 2: Rename the notebook
For this tutorial, I renamed the Notebook My First Dry Lab.
Step 3: Import RDKit
Since Google Colab doesn't include RDKit by default, we must install it before we can begin working with molecules. Fortunately, this only requires a single command.
Every Python notebook is divided into cells. Each cell contains code that can be executed independently, allowing you to write and test small pieces of code one step at a time.
Step 4: Your first code
Now let's write your first two lines of code by "inviting" RDKit tools to our environment. In programming, this process is called importing a library.
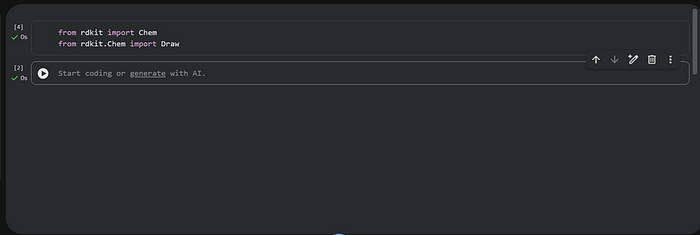
The first line imports RDKit's chemistry module, while the second imports the drawing module that allows us to visualize molecules.
Drawing Your First Molecule
Guess what? Drawing your first molecule with a computer is actually easier than drawing it on paper. All it takes is one line of code.
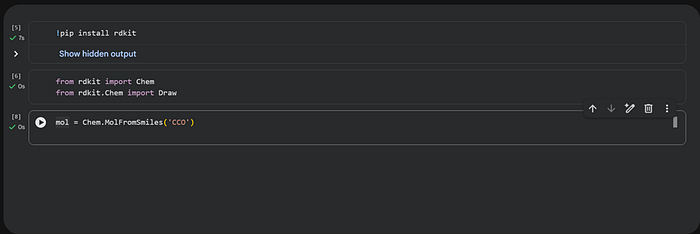
If you read the previous article, the text CCO should already look familiar. It is the SMILES representation of ethanol. This time, instead of simply reading the notation, we'll ask the computer to interpret it.
The single line of code above converts the SMILES representation of ethanol into a molecular object that RDKit can understand and manipulate.
Congratulations! You have just completed your first computational chemistry experiment. In only a few lines of Python code, you've asked a computer to interpret a molecular representation and generate a chemical structure.
This simple visualization of ethanol is only the beginning. It is the gateway to calculating molecular descriptors, building QSAR models, and applying machine learning to solve chemical problems.
You just asked a computer to understand a molecule.
Key Takeaways
- A dry lab uses computational tools to investigate chemical problems: no reagents, no equipment budget, no institutional funding required.
- Google Colab, Python, and RDKit are the three core tools in this series: all free and accessible through a browser.
- RDKit can read a SMILES string and render a molecular structure in a single line of code.
- This workflow — SMILES → molecular object → visualization — is the foundation for descriptors, fingerprints, and QSAR modelling in later articles.
- Any chemistry student with a Google account and an internet connection can begin today.
Looking Ahead
In Article 4, we will move beyond a single molecule and learn how to explore and retrieve millions of chemical structures from open chemical databases such as PubChem and ChEMBL. Once we know how to find chemical data, we'll begin turning molecules into machine-readable information.
Your Bench Challenge
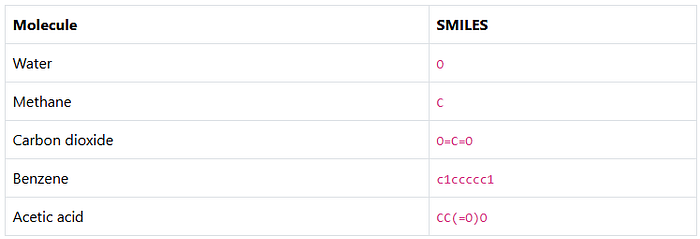
Before moving to the next article, try replacing the SMILES string CCO With the following molecules, see what RDKit draws.